Manage users and access
People sign in to the Portal with an account in Keycloak realm oop. Three settings on that account decide what they can do:
| Setting | What it decides | Where to change it |
|---|---|---|
| Realm roles | What a person may do: app-provider, which every account gets, operator and platform-admin |
Role mapping › Realm roles |
| API products | Which CAMARA APIs they may call | Role mapping › Client roles, under oeg |
| Organization ID | The organization written into their tokens | Details › Organization ID |
You change all three in Keycloak's admin console. The Portal has no user pages.
These accounts exist after an install:
| Account | Created | What it has |
|---|---|---|
admin, realm master |
Every install | Keycloak's own administrator, the only account that opens the admin console |
oop-admin |
Every install | app-provider and platform-admin, no API products, a temporary password |
dev-provider, dev-operator, dev-admin |
Only with keycloak.realms.oop.sampleUsers.enabled: true on a localhost address, as in the kind environment |
app-provider, plus operator for dev-operator and platform-admin for dev-admin; all four API products; organization dev-org; one shared password, dev-user-password in keycloak-credentials |
| Developers | When they register, from the Portal's sign-in | app-provider only: no API products and no organization ID until you give them |
Before you start
- A platform installed with login on, as in Deploy with Helm.
kubectlaccess to the platform's namespace,oop, to read the passwords the chart generated.- The examples use the kind addresses: Keycloak on
http://localhost:30081, the Portal onhttp://localhost:30082.
Steps
1. Open the admin console
Read the password of Keycloak's own administrator:
kubectl -n oop get secret keycloak-credentials -o jsonpath='{.data.admin-password}' | base64 -d; echo
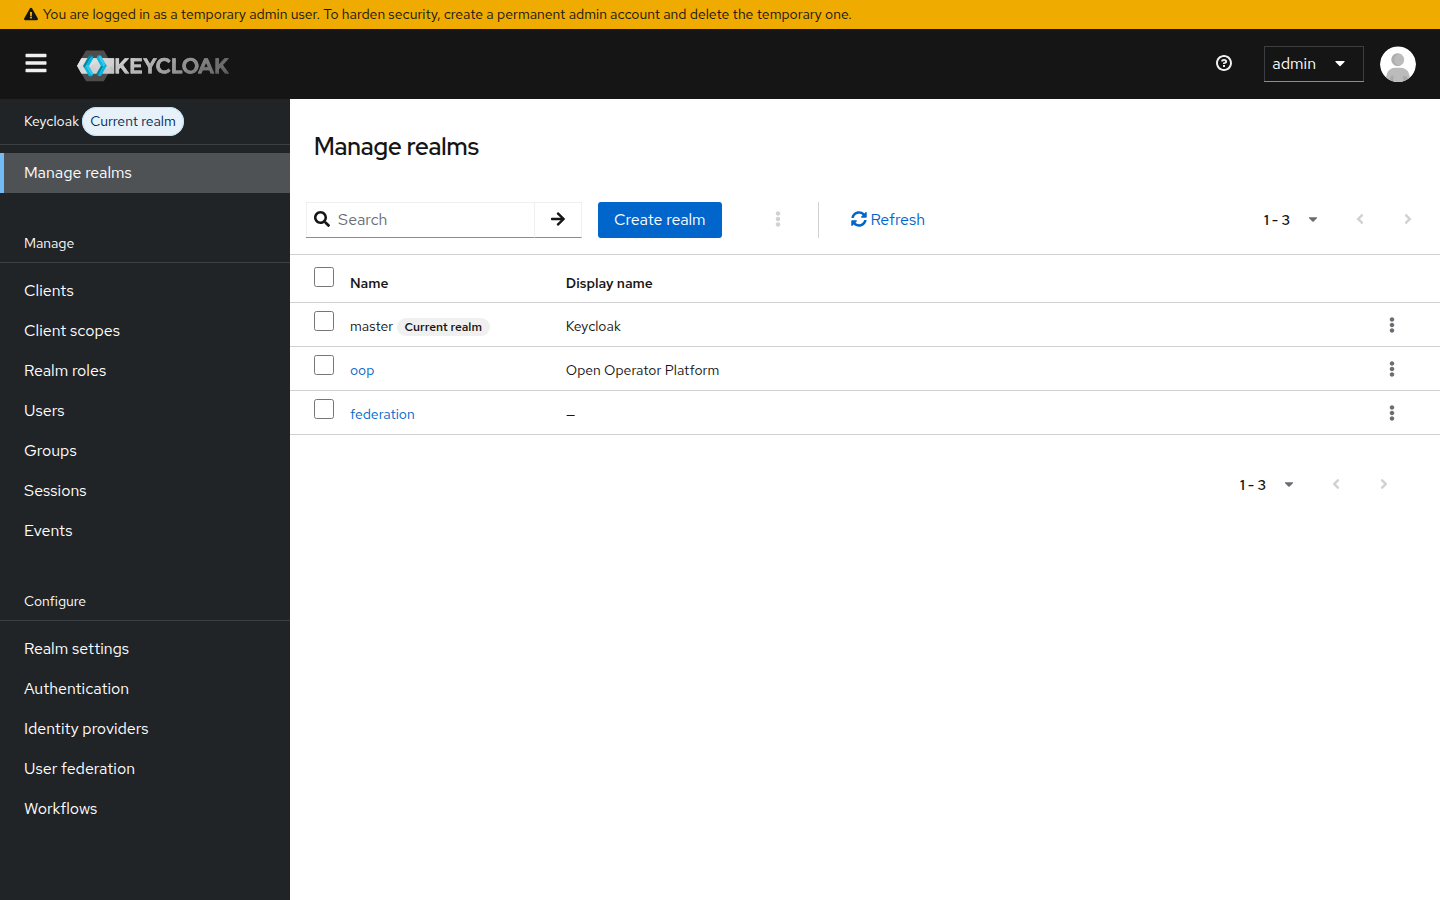
Open http://localhost:30081/admin and sign in as admin. The console opens on realm master: choose Manage realms in the sidebar, then oop.
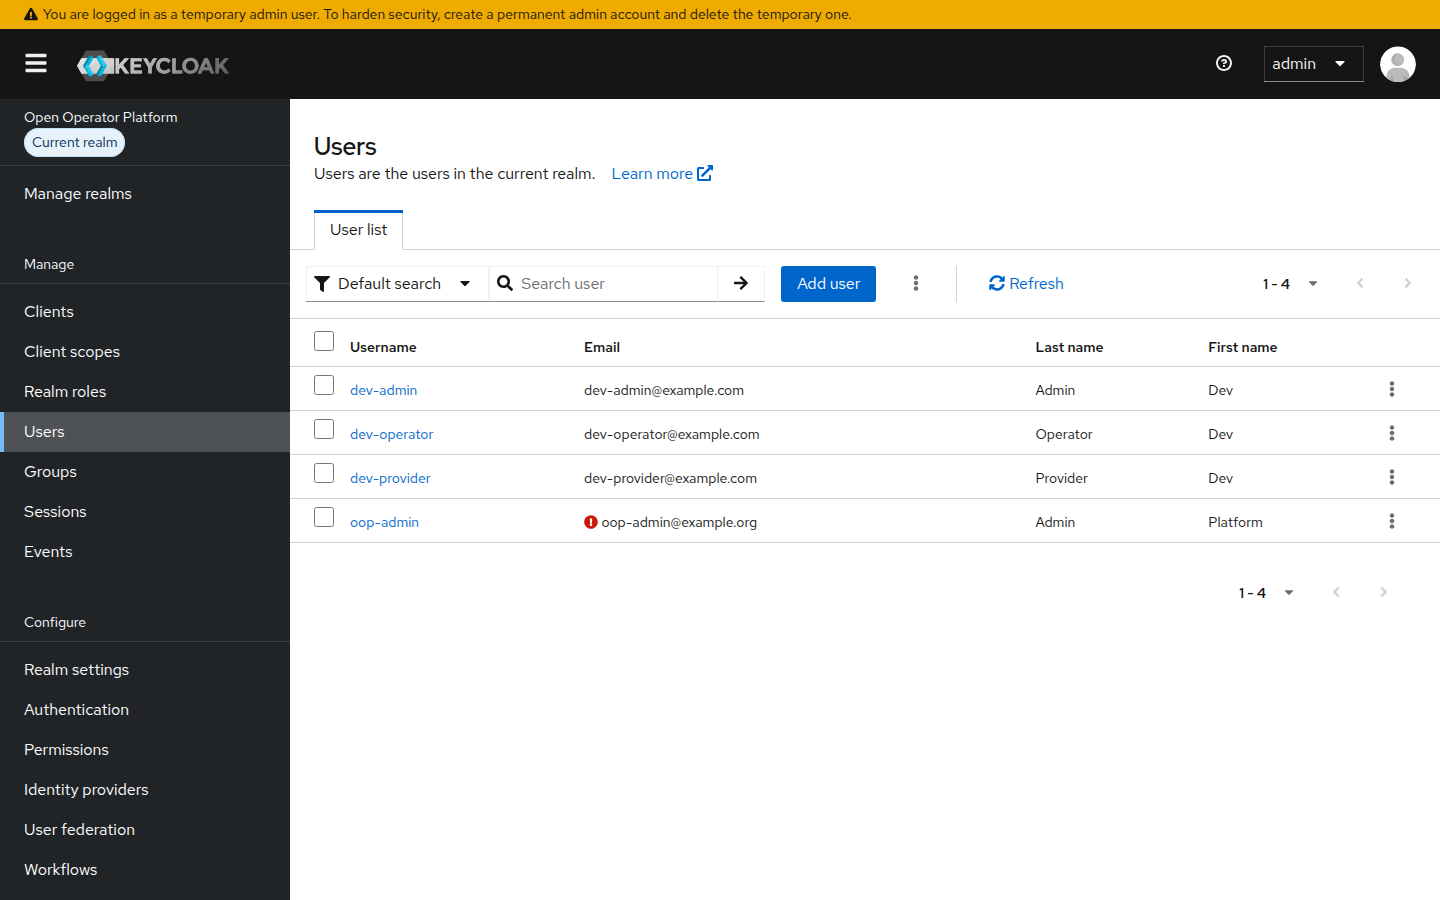
Users lists every account in the realm.
2. Finish the first administrator account
Read the temporary password of oop-admin:
kubectl -n oop get secret keycloak-credentials -o jsonpath='{.data.initial-admin-password}' | base64 -d; echo
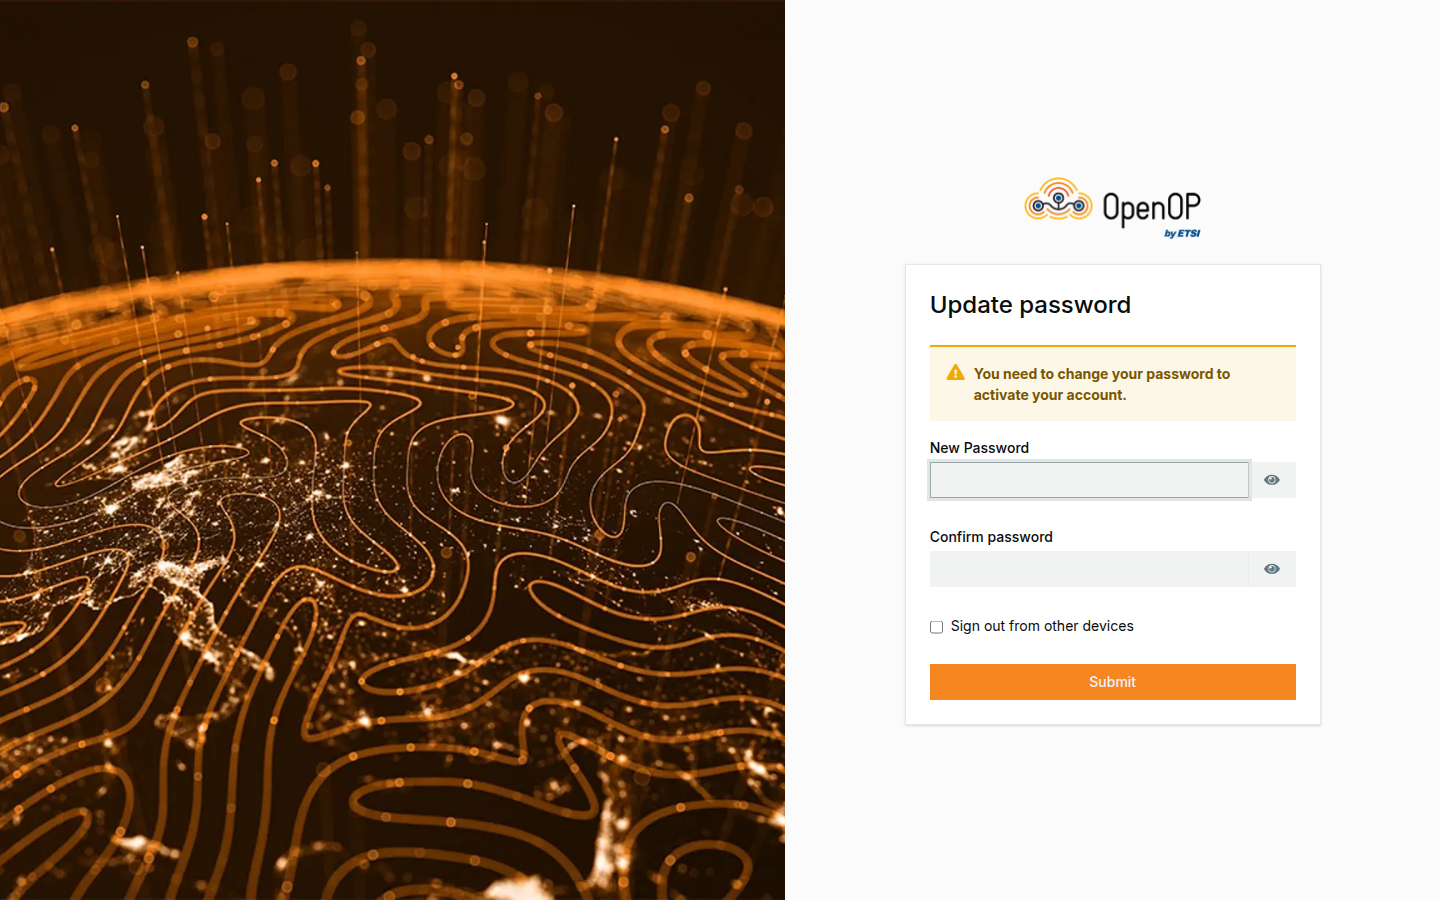
Open the Portal at http://localhost:30082. It sends you to Keycloak's sign-in page, which carries the OpenOP look. Sign in as oop-admin with that password. Still on Keycloak's pages, you are asked for a new password, then for an email address and a first and last name. Then you are back in the Portal, signed in.
oop-admin is a Portal account: it cannot sign in to the admin console. Use admin there, as in step 1.
3. Let developers register
Developers create their own account: they open the Portal and choose Register on Keycloak's sign-in page. The Organization field is optional and only a request; step 6 explains it.
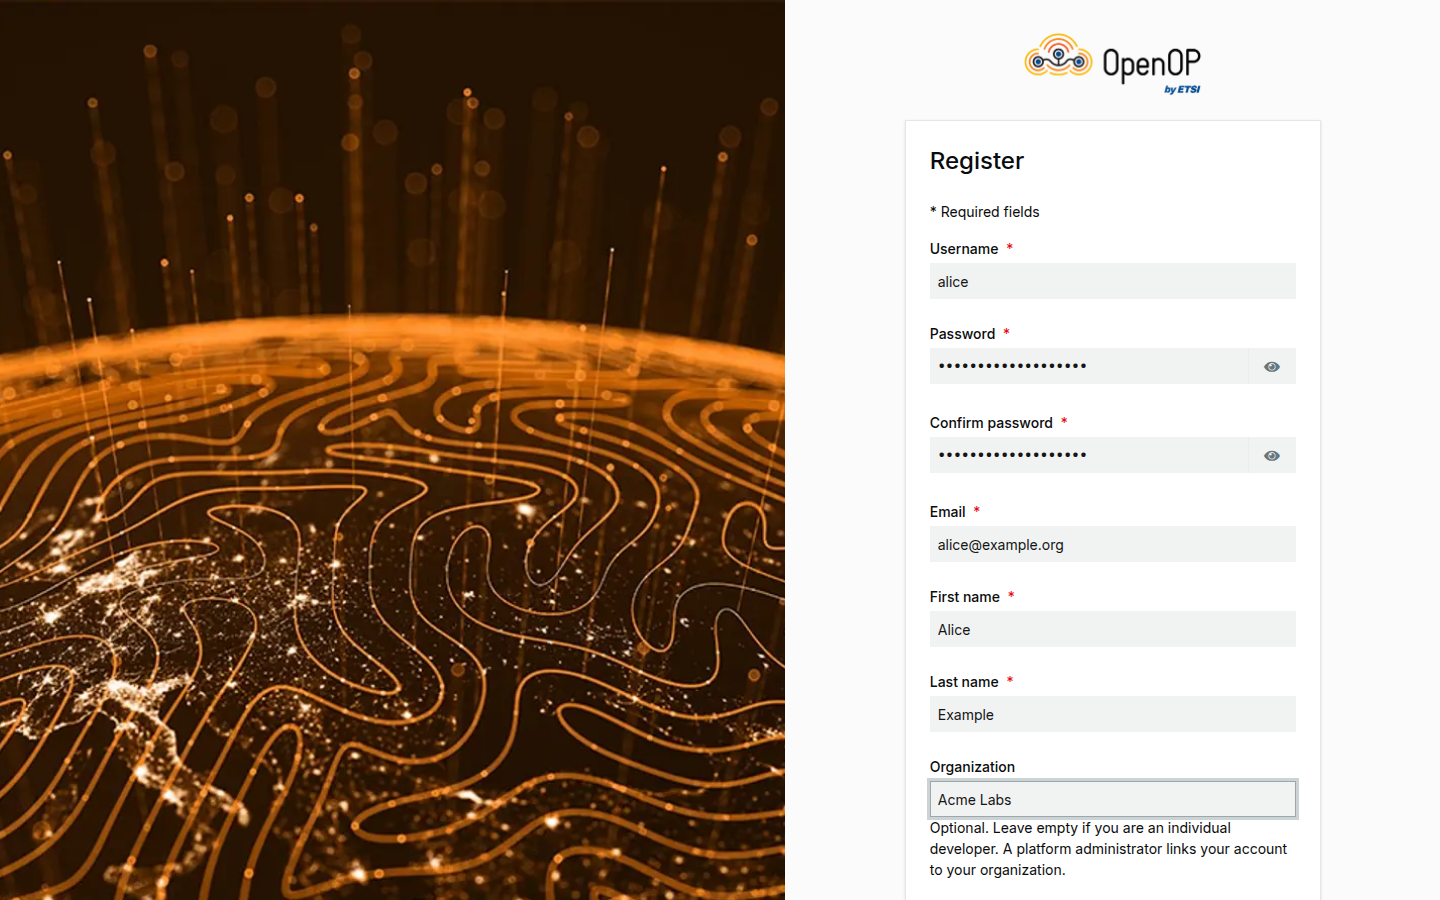
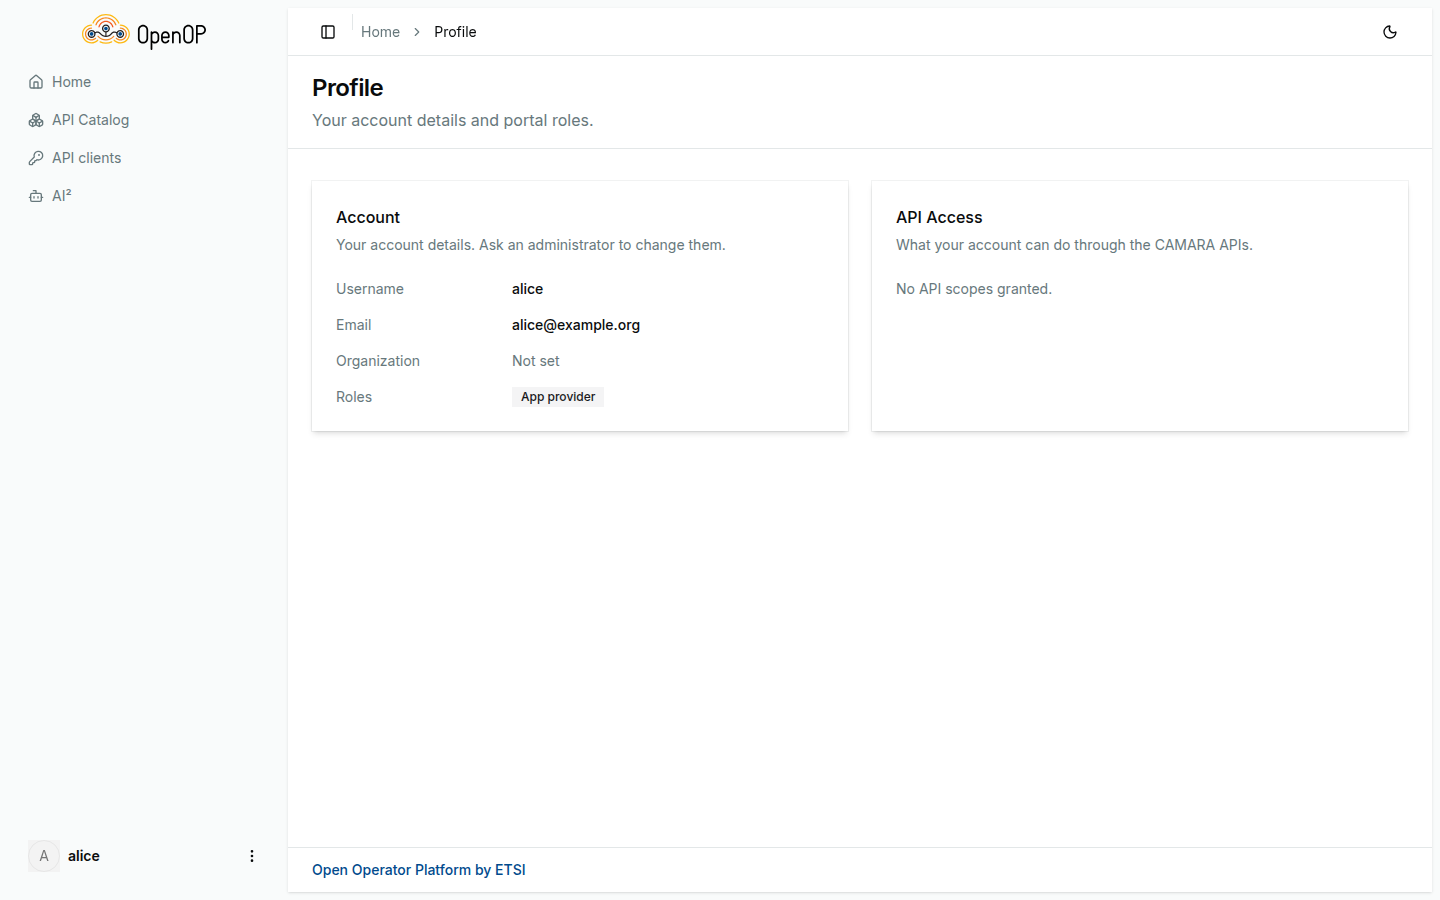
A new account can sign in and browse, but its Profile shows No API scopes granted and it can call no CAMARA API. The next steps give it what it needs.
Anyone who can reach the Portal can register. To stop that, turn off Realm settings › Login › User registration, and create accounts yourself with Users › Add user, setting a temporary password as in step 7.
4. Give a role
There are three roles:
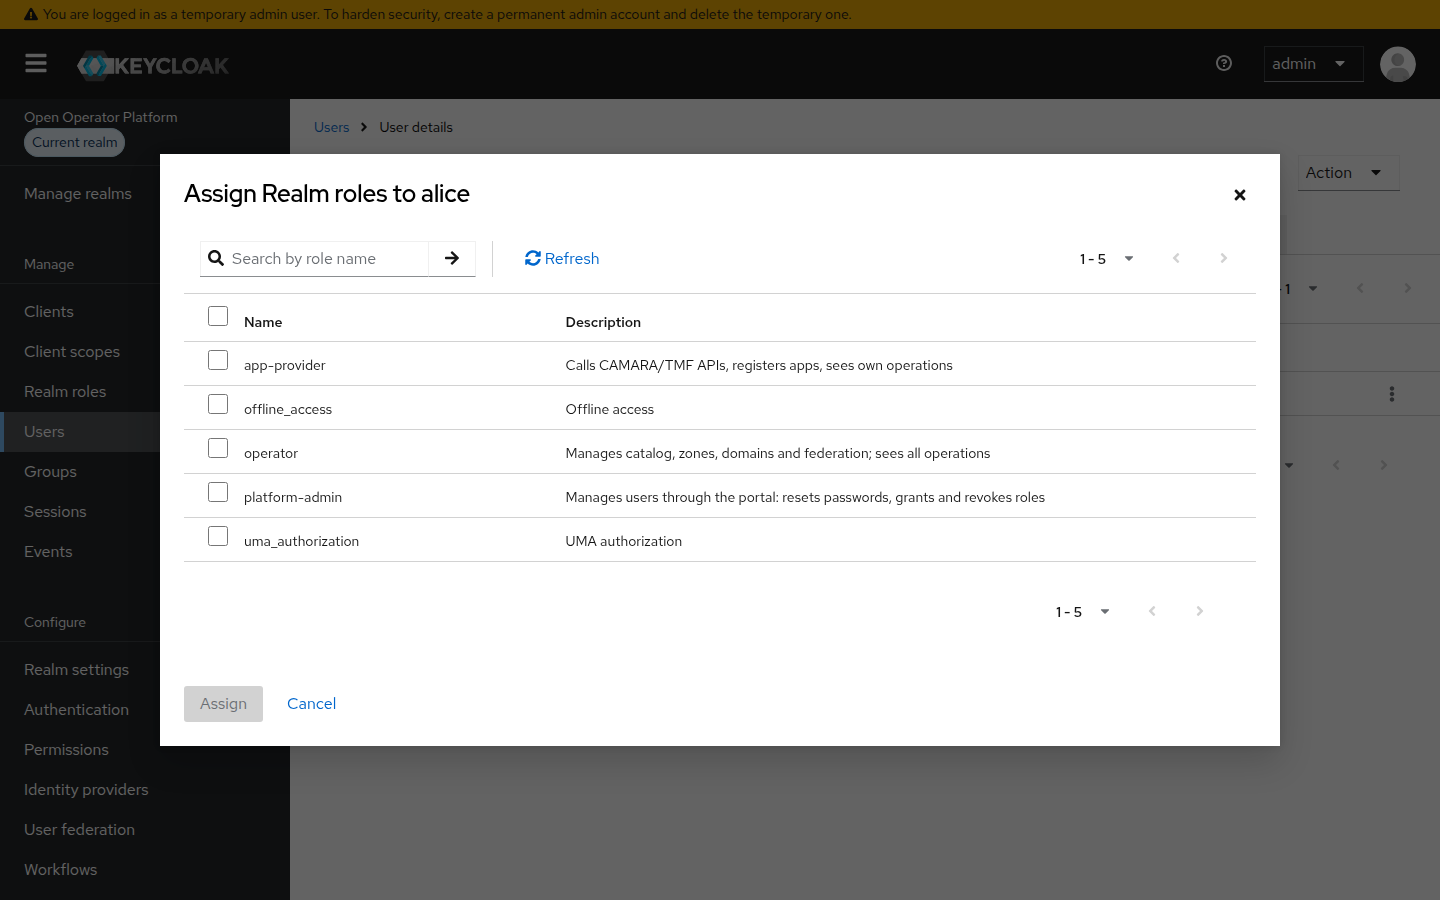
app-provider, for developers: with an API product, it opens that CAMARA API in OEG, and it opens the Portal's API clients page. Every account gets it at registration, so developers need nothing else here.operator, for people who manage federation partners: it opens the Portal's Federation page and OEG's federation calls.platform-admin, for people who administer users. In Release 2.0.0 it grants nothing yet: user administration happens in the admin console, as on this page.
To give operator or platform-admin: Users › the user › Role mapping › Assign role › Realm roles. The descriptions in this list promise more than Release 2.0.0 does; the list above is what each role opens today. No role includes another, and one person can hold several. To take a role away, tick it and choose Unassign.
5. Grant API products
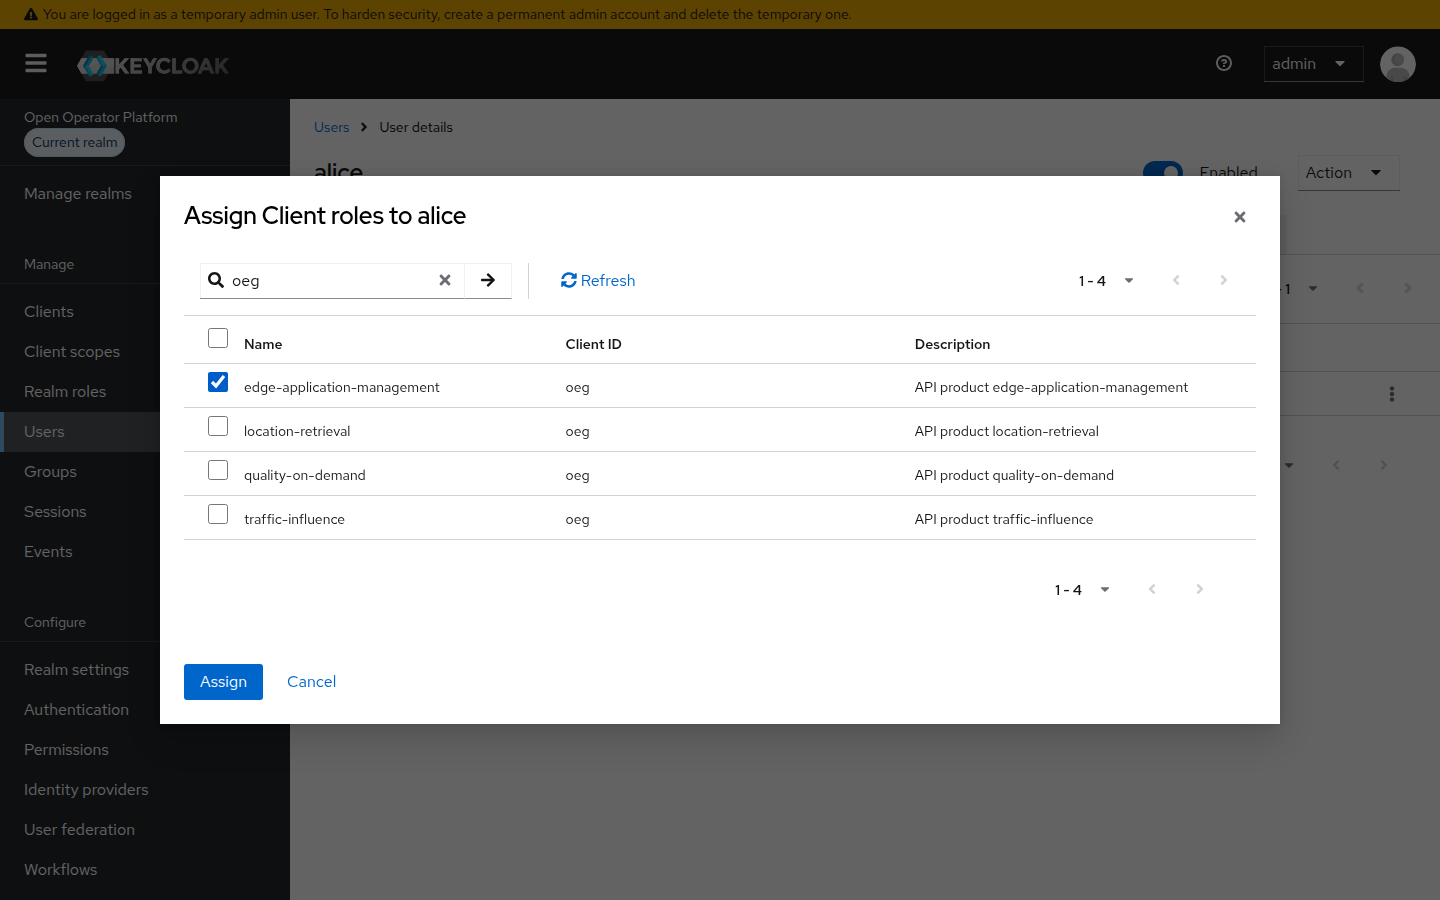
Users › the user › Role mapping › Assign role › Client roles, search for oeg, tick the products and choose Assign:
| Product | API |
|---|---|
edge-application-management |
Edge Application Management |
quality-on-demand |
Quality on Demand |
location-retrieval |
Location Retrieval |
traffic-influence |
Traffic Influence |
To take a product away, unassign it from the user and from each of their API clients, which hold their own copy; see step 9.
6. Set a user's organization
Users › the user › Details. Organization shows what the user typed when registering; nothing trusts it. Type the real ID into Organization ID, using lowercase letters, digits and hyphens, for example acme-labs, and Save. Use the same ID for everyone in one organization.
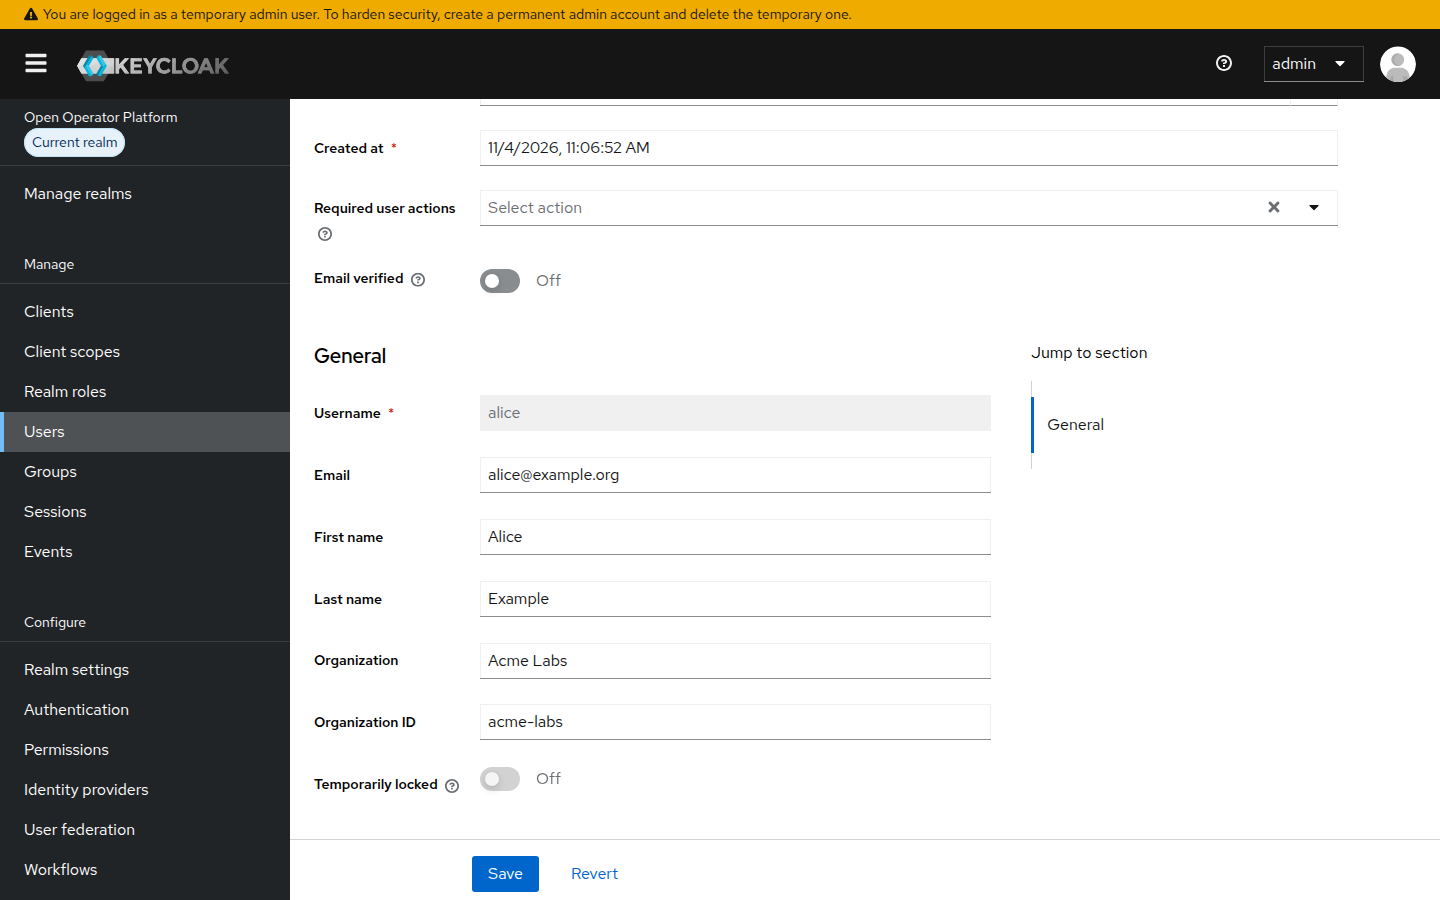
The ID goes into the user's tokens as organization. In Release 2.0.0, OEG still keeps applications, instances and deployments private to each App Provider, not shared across an organization.
7. Reset a password
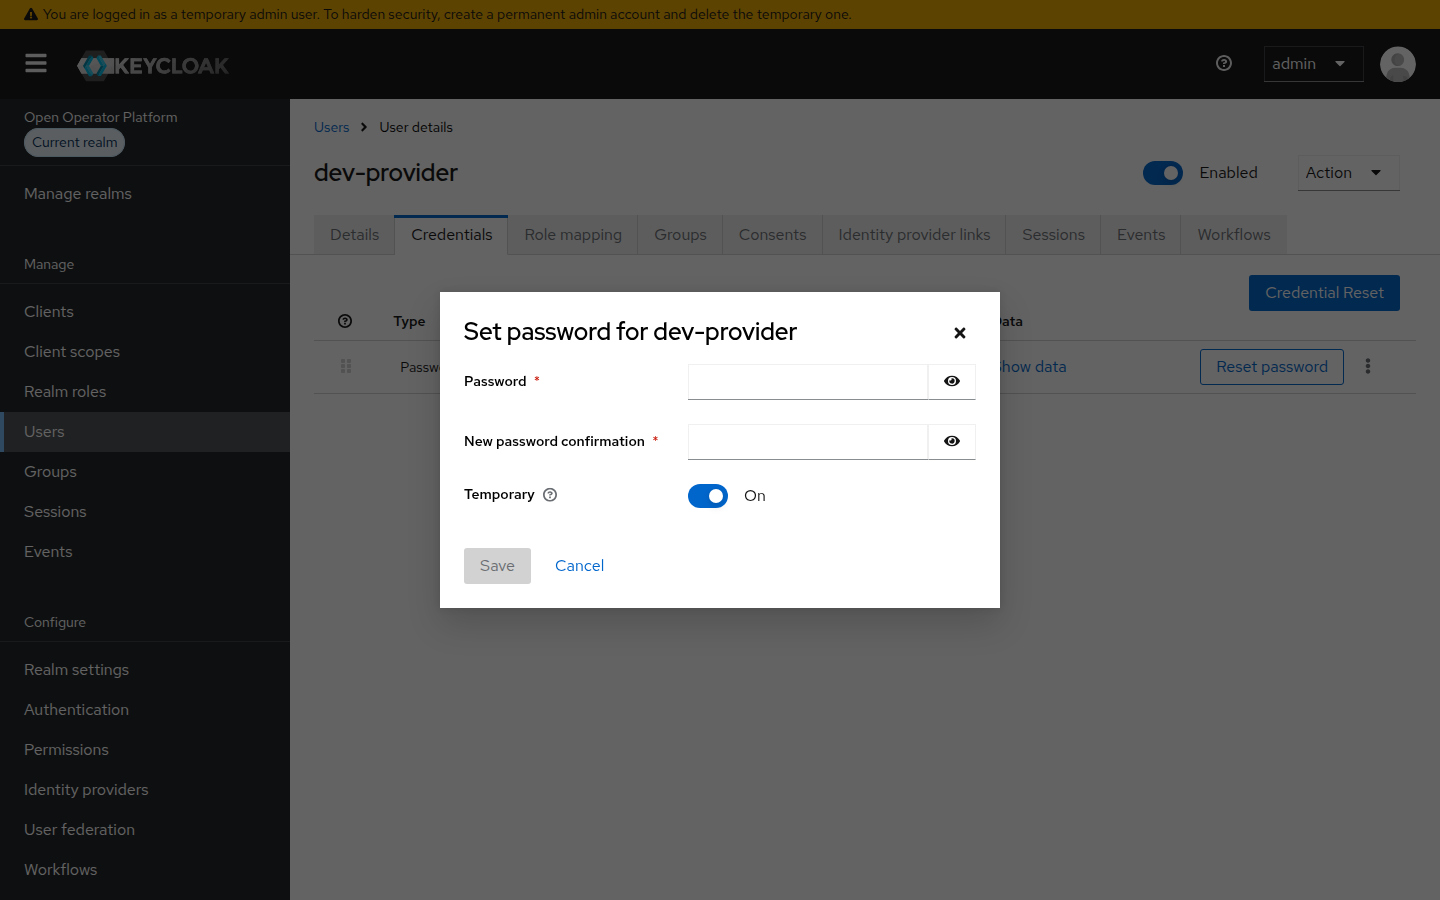
The platform sends no email, so users cannot reset their own password. Users › the user › Credentials › Reset password, and leave Temporary on so that the user picks a new one at the next sign-in.
8. Disable or remove a user
Users › the user › turn Enabled off. The user can no longer sign in, and tokens they already hold expire within 5 minutes. To remove the account for good, choose Action › Delete instead.
Neither stops the user's API clients: they keep getting tokens. Delete those clients as well, as in step 9.
9. Look after developers' API clients
Developers create their API clients in the Portal, as in Get API access. Each one is a client in realm oop, under Clients, with an ID such as api-cb6509a5 and the name the developer gave it. To see whose it is: the client › Client scopes › api-…-dedicated › mapper app-provider-id, whose claim value is the developer's user ID, as shown on their Details.
- To stop a client, delete it: the client › Action › Delete. It gets no more tokens; tokens already issued expire within 5 minutes. The client then stays in the developer's Portal list and counts toward their five, so when you can, ask the developer to delete it in the Portal instead.
- Do not just turn Enabled off. The developer can then no longer delete the client from the Portal, and turning it on again brings the old secret back.
- To take a product away from a client: the client › Service account roles, tick the product and choose Unassign.
- To reset a lost secret: the client › Credentials › Regenerate next to Client Secret, and send the new secret to the developer. Never regenerate the Registration access token: the Portal needs it to delete the client.
10. Optional: run without login
On your own machine, you can switch login off for the whole platform, with no Keycloak and no accounts at all. The Quickstart shows how, and what this dev mode leaves out.
Check it worked
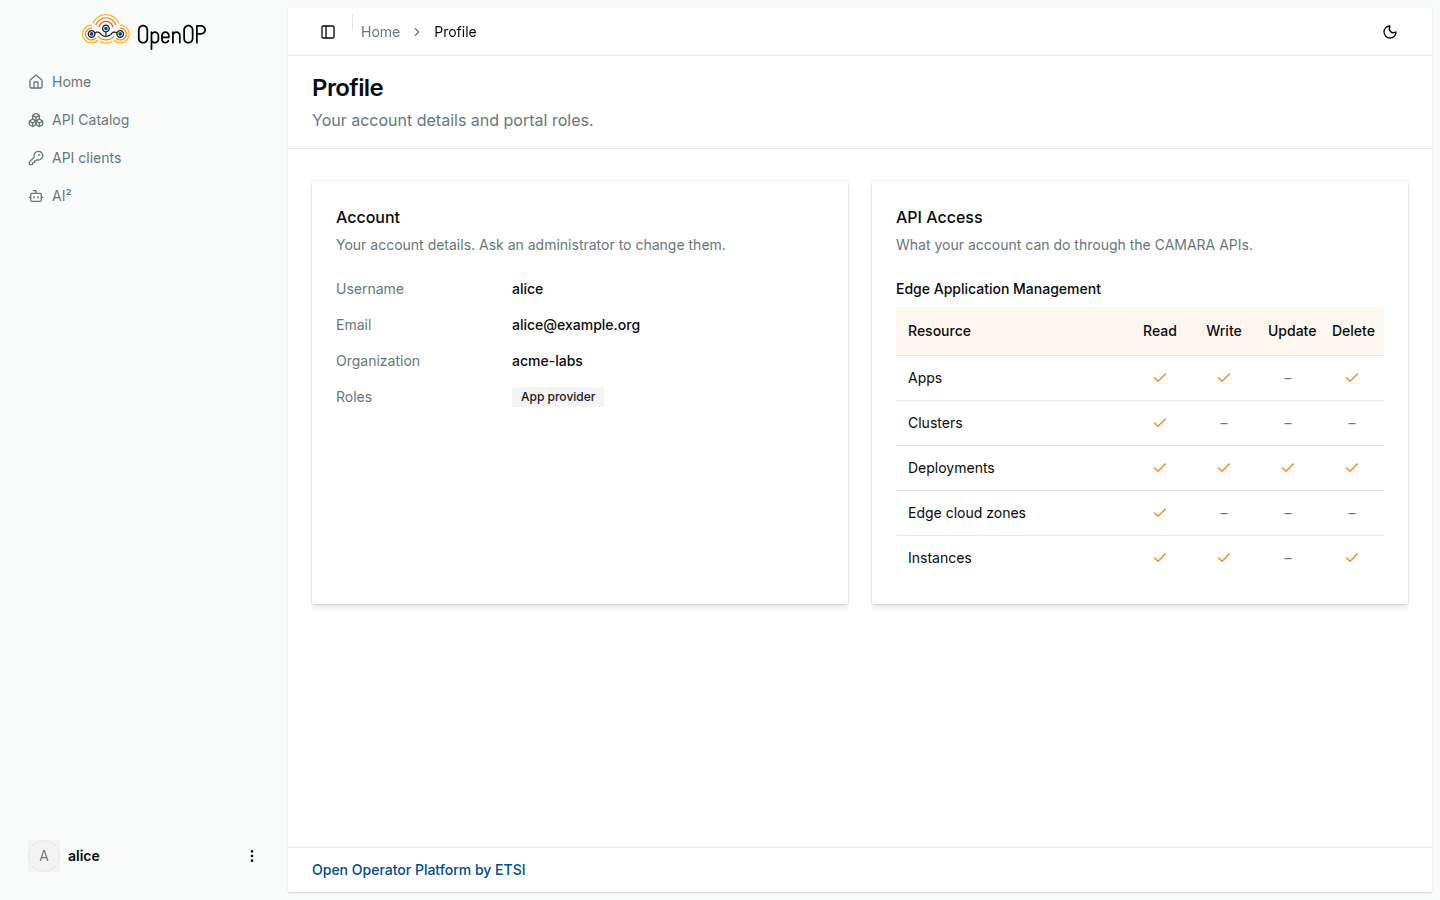
Changes reach a user at their next sign-in, or within 5 minutes. The user opens the account menu at the bottom of the Portal's sidebar and chooses Profile. It shows their Organization, their Roles, and under API Access what each granted product allows.
All options
The Keycloak chart README covers roles, API products, the generated secrets and further how-tos, such as adding a partner operator or changing realm settings after install.