Tour the Portal
The Portal is the browser-based interface to the Open Operator Platform. In this tutorial, you will sign in, review your account and API permissions, explore the API catalog, and discover the Portal’s application management, API clients, federation, and AI² features.
Before you start
Start with a running Open Operator Platform and its Portal URL. Ask your platform administrator for the URL and a user account. If your account is already prepared, you can continue to Sign in.
To complete this tour, your Portal account needs:
- Access to the Edge Application Management API product to complete the API request and application-management sections. The
app-providerrole is required for the API clients section. - The
operatorrole to explore Federation Management. You can skip that section if you do not have this role.
If you need to create an account or configure its access, follow Manage users and access, then return here to sign in.
1. Sign in
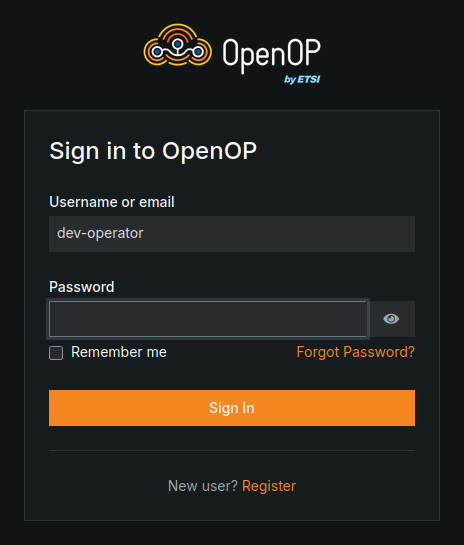
Open the Portal URL supplied by your administrator. You will be redirected to Keycloak login page, where you authenticate with your platform account.
- Enter your username and password, then select Sign In.
- After signing in, you are returned to the Portal.
Find your way around Home
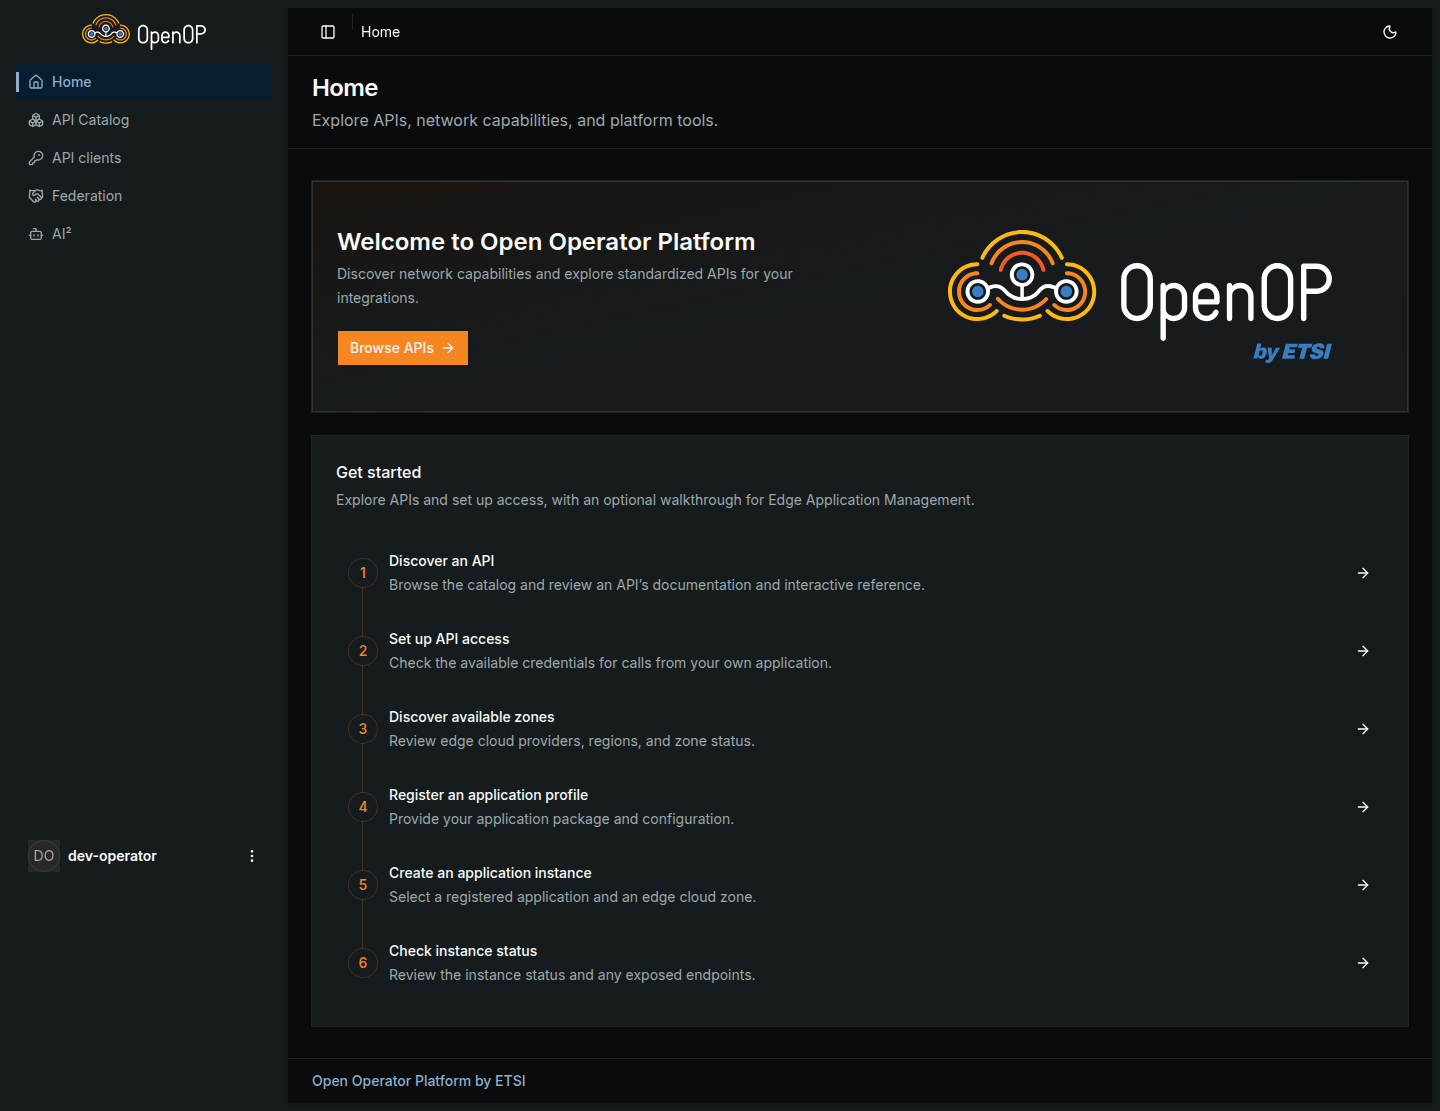
The Home page provides a Browse APIs shortcut and a Get started guide linking to API discovery, credentials, zones, application profiles and instances. Use the sidebar to move between the main Portal pages. The available navigation items depend on your account's roles.
Check your account and API access
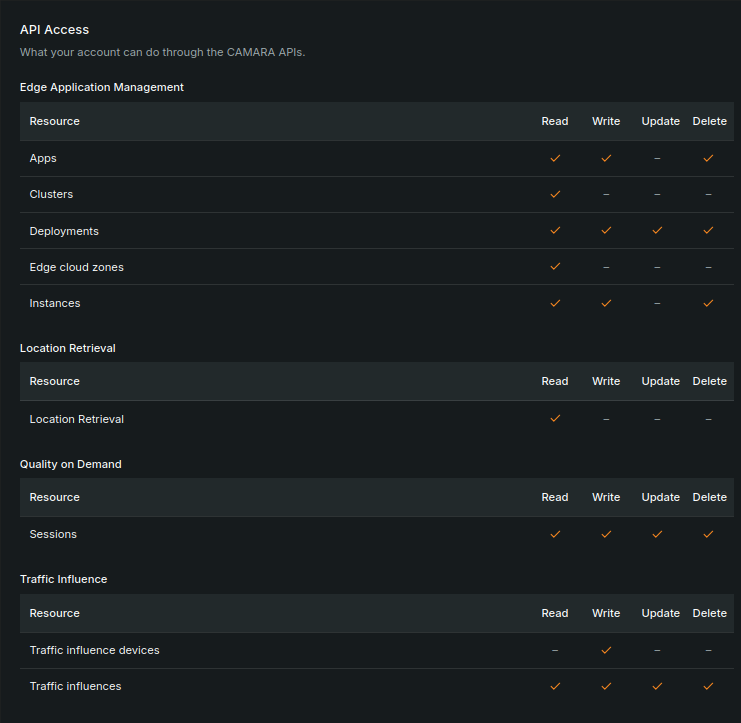
Open the account menu and select Profile.
- Under Account, confirm your App provider (
app-provider) role and, for Federation Management, Operator (operator). - Under API Access, find Edge Application Management. Check marks show your granted permissions.
If access is missing, contact your administrator, then sign in again after it is updated.
2. Browse the API catalog
The API Catalog introduces the platform's APIs and provides an interactive reference for trying requests.
- Select API Catalog in the sidebar. Each card shows an API's name, category, description, and version where available.
- Select Edge Application Management to open its Overview. Read the introduction and usage guidance to understand how the API manages applications on the edge cloud.
- Scroll to API reference. Expand an operation to inspect its parameters, request format, and documented responses.
Try a request
Use a read-only operation to explore the API without changing any resources:
- Find and expand GET /apps, which lists existing application definitions.
- Leave the optional parameters empty and select Execute. The Portal opens every operation ready to run, so there is no Try it out button.
- Check the Server response code and response body. A successful request returns
200with the applications visible to your account; an empty list is expected if none have been registered.
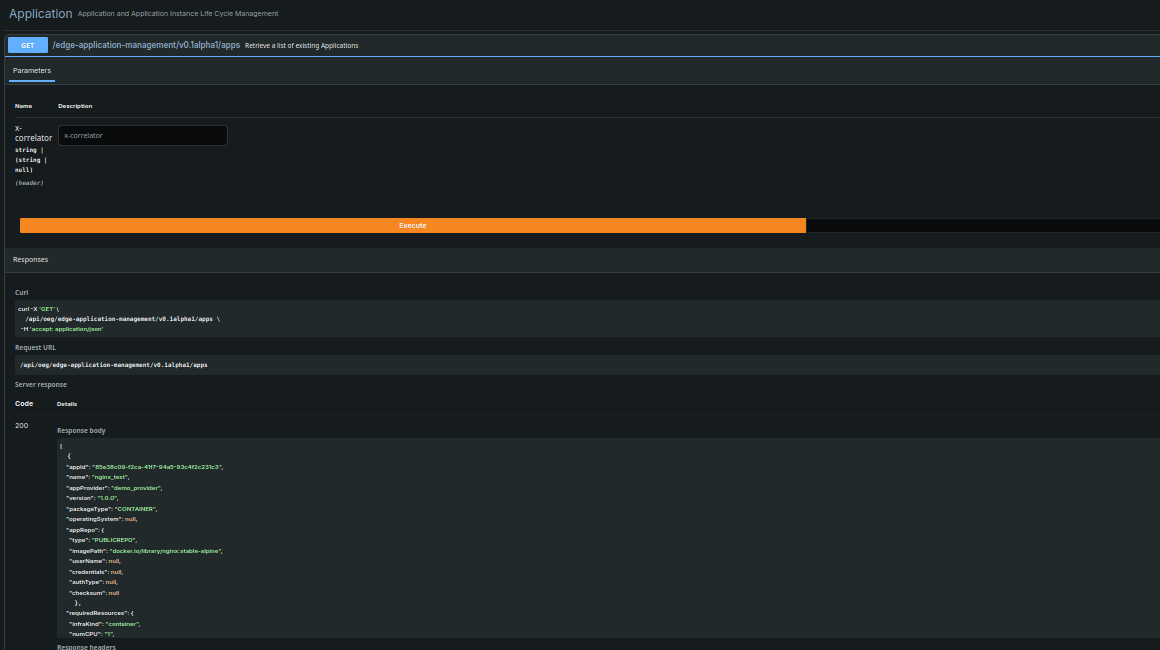
Requests through the Portal use your signed-in session. If the request returns 401, sign in again. If it returns 403, check your API access with your administrator. A 502 means OEG refused the request; ask your administrator.
Next, select Explore at the top of the Edge Application Management page to find the application management interface.
3. Explore Edge Application Management
Edge Application Management provides a graphical interface for managing application profiles, application instances, deployments, and edge cloud zones.
To open the interface, select API Catalog from the sidebar, open Edge Application Management API, and select the Explore tab.
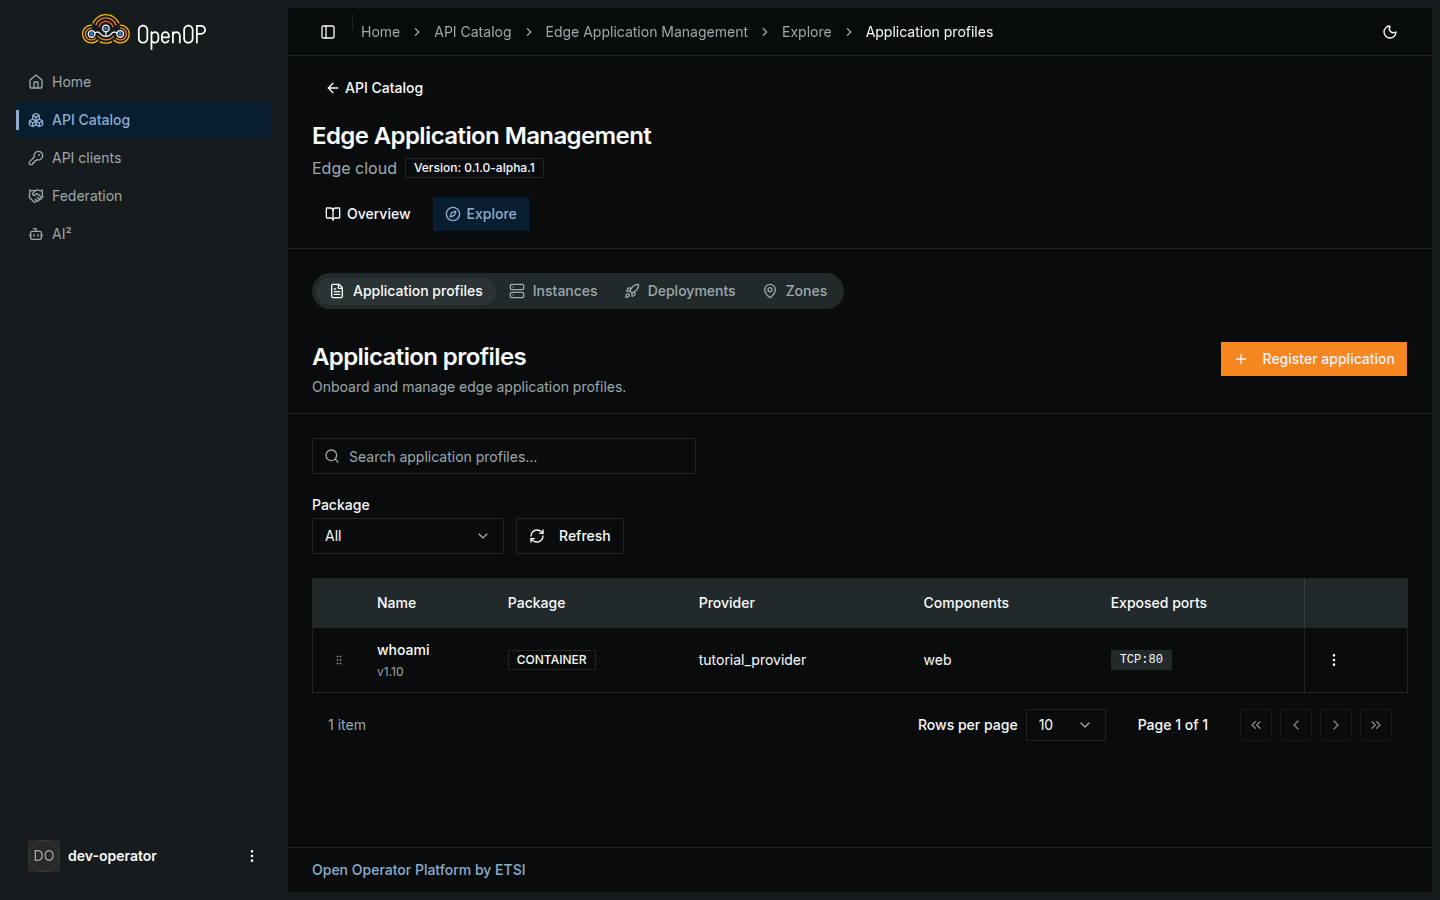
The interface provides four sections: - Application profiles: Browse, create, inspect, deploy, and delete application profiles. - Instances: Browse, create, inspect, and delete application instances. - Deployments: Browse, inspect, and delete deployment records. - Zones: Browse the available edge cloud zones.
Browse application profiles
The first tab is the one for application profiles, which lists the applications available for deployment on the edge cloud. They provide the information needed to identify an application and select it for deployment.
- Open Application profiles from the Edge Application Management tabs.
- Browse the available profiles in the table. Use the displayed information to identify an application, including its name, provider, and other details.
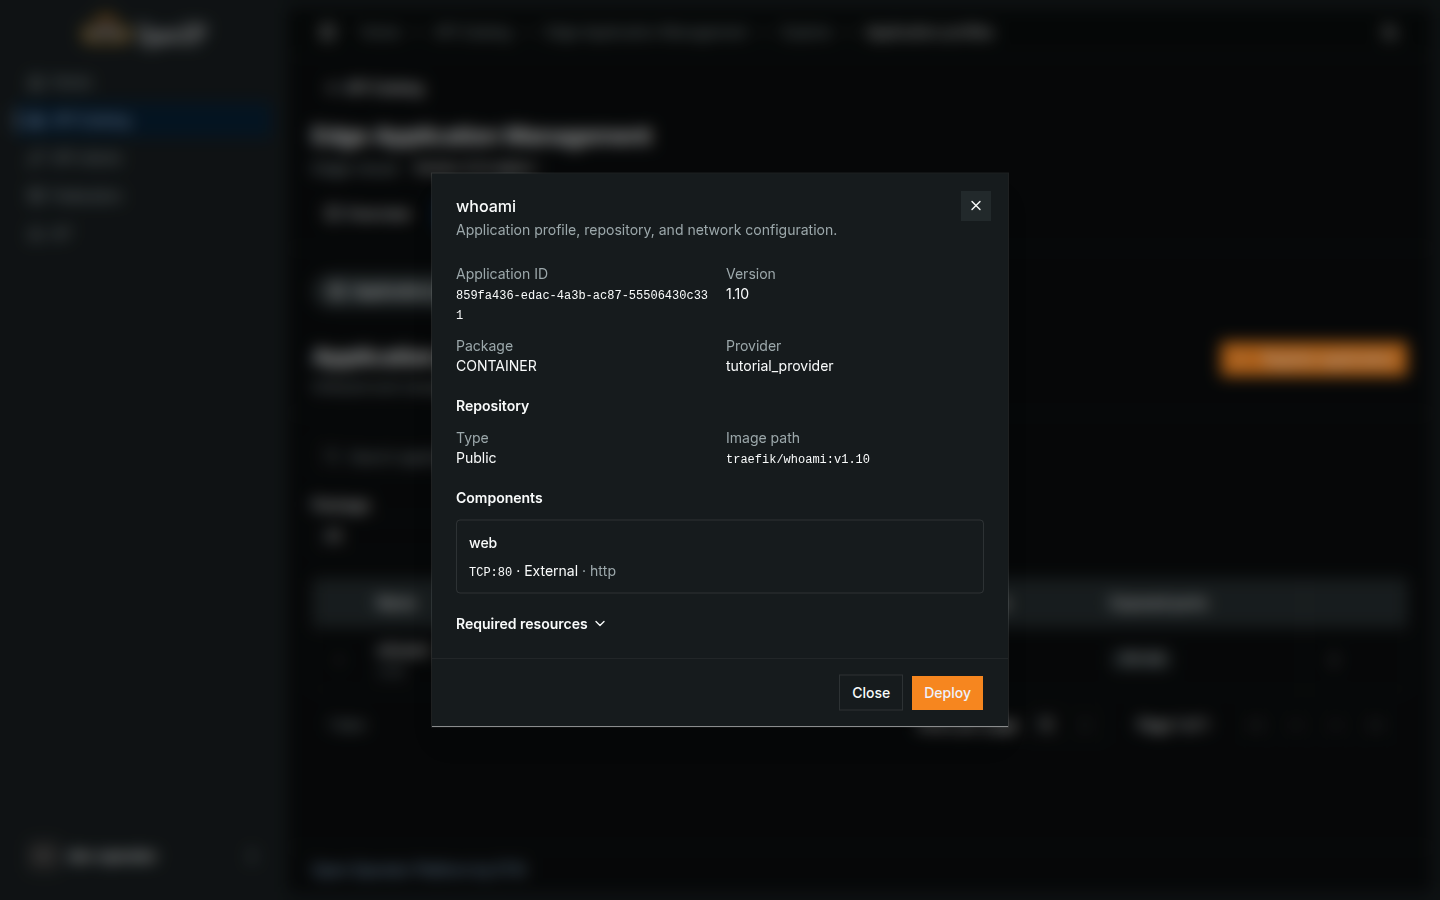
- Select an application profile to view its details. You can either click on the profile name or select the Details from the available actions.
- Review the profile information.
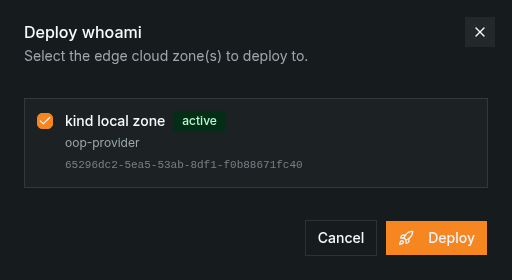
- To deploy the application, select Deploy in the details dialog. In the dialog that opens, select one or more active edge cloud zones. With one zone, the Portal starts an application instance, listed under Instances. With several zones, it creates a multi-zone deployment, listed under Deployments. An application can have only one instance in each zone.
If no application profile matches your requirements, select Register application to register a new one. The new profile appears in the table as soon as it is registered.
In addition to viewing application profiles details, another available action is to Delete an application profile. Before confirming a destructive action, verify that you have selected the intended profile.
Select Refresh to retrieve the latest application information.
If no application profiles are available, the page displays an empty state.
Manage application instances
The Instances tab presents the individual application instances associated with edge cloud zones. The page lets you browse the available instances, inspect their current state and instantiation details and create a new instance.
- Open Instances tab from the Edge Application Management tabs.
- Browse the instances table. Review the available information, such as the instance name, application, target zone, and current state.
- Select an instance to open its Details. Review its current status and any available endpoint information. The status indicates whether the instance is ready, still being processed, or has failed. Endpoint information is displayed when available; an instance may have no endpoints, particularly when deployment has not completed successfully.
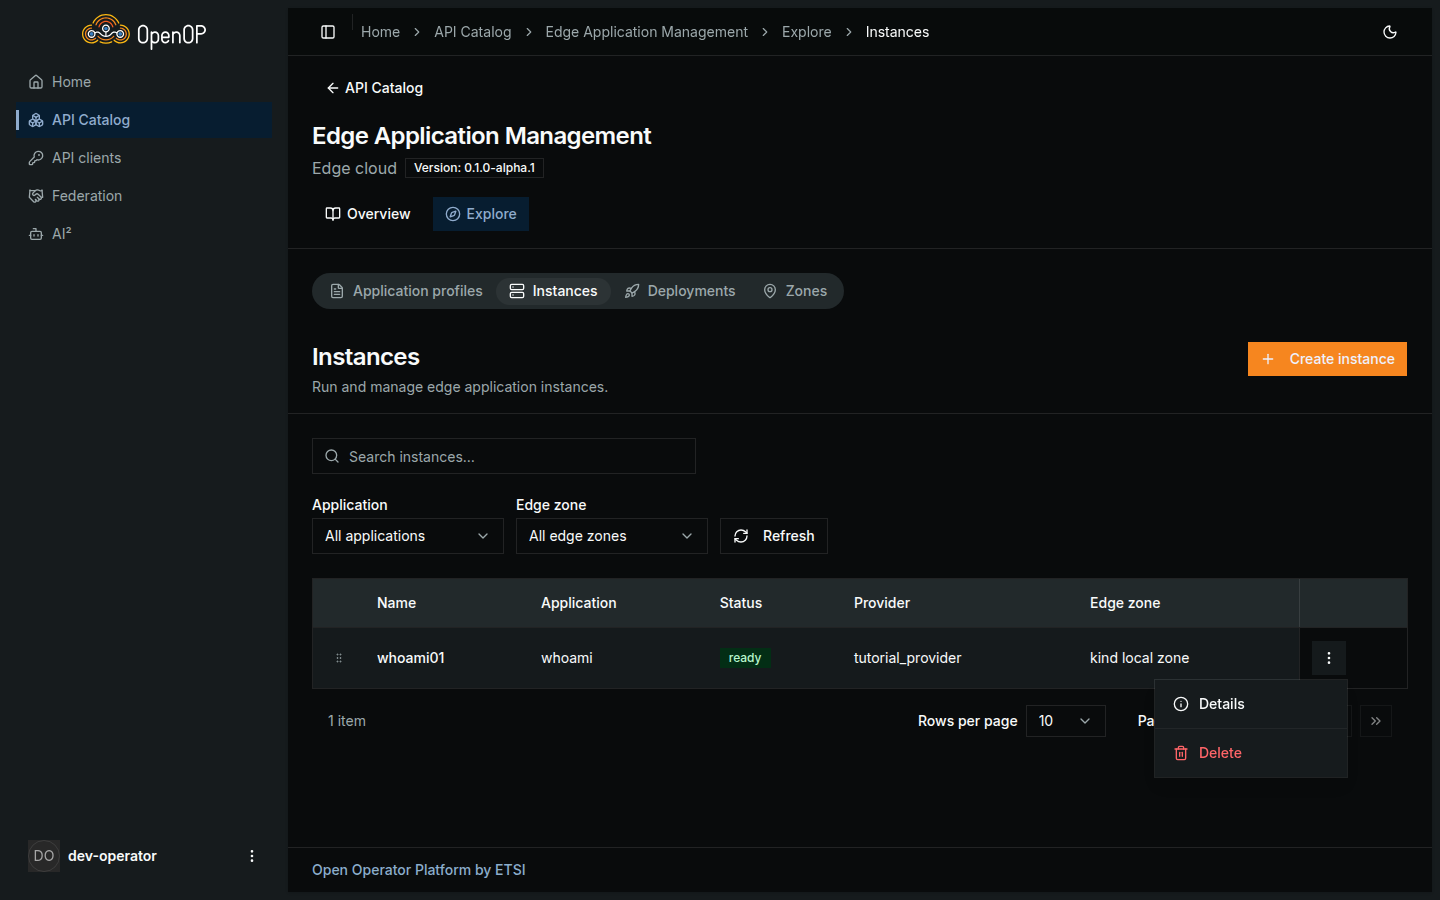
In addition to viewing instances details, another available action is to Delete an instance. Before confirming a destructive action, verify that you have selected the intended instance.
Select Refresh to retrieve the latest instance information.
If there are no instances in the inventory, the page displays an empty state.
Manage application deployments
The Deployments tab presents the application deployments and their associated edge cloud zones. Contrary to an application instance which is running in a single zone, an application deployment can extend to multiple zones. This page lets you inspect multi-zone deployment records and their target zones. Check individual application instances for runtime status.
- Open Deployments from the Edge Application Management tabs.
- Review the deployments listed in the table. Available information includes the deployment name, application, and target edge cloud zones.
- Select a deployment to inspect its Details.
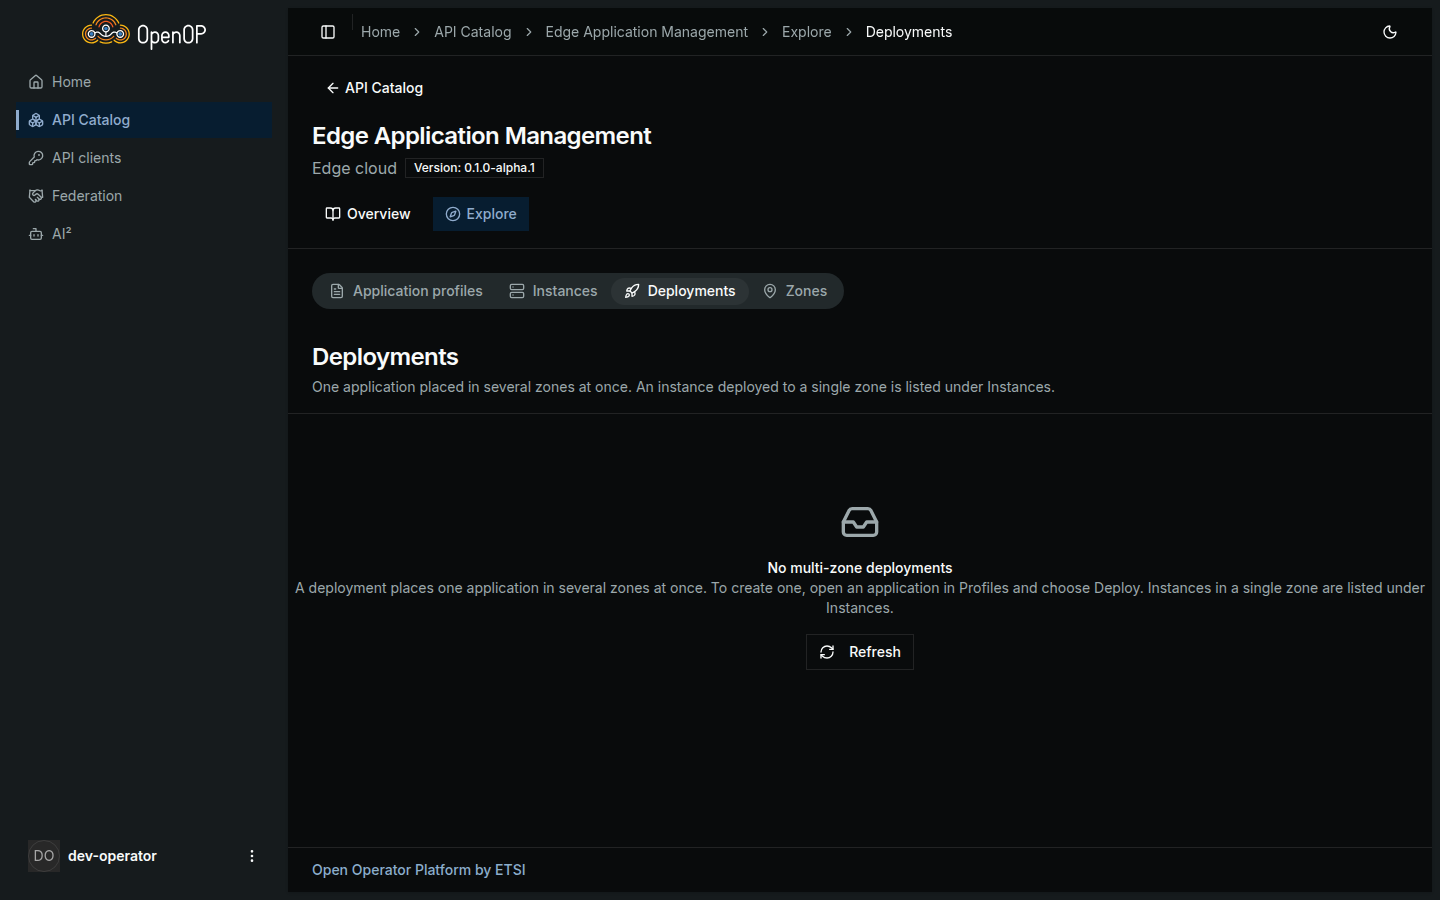
In addition to viewing deployment details, another available action is to Delete a deployment. Before confirming a destructive action, verify that you have selected the intended deployment.
On a platform with a single edge cloud zone, such as the kind setup, the tab stays empty, as above.
Browse edge cloud zones
The Zones tab presents the available edge cloud zones, where applications can be instantiated or deployed.
- Open Zones from the Edge Application Management tabs.
- Review the zones listed in the table. Available information includes the zone name, zone ID, provider, region and status.
The zone status is particularly important: only active zones are offered as targets when you deploy an application.
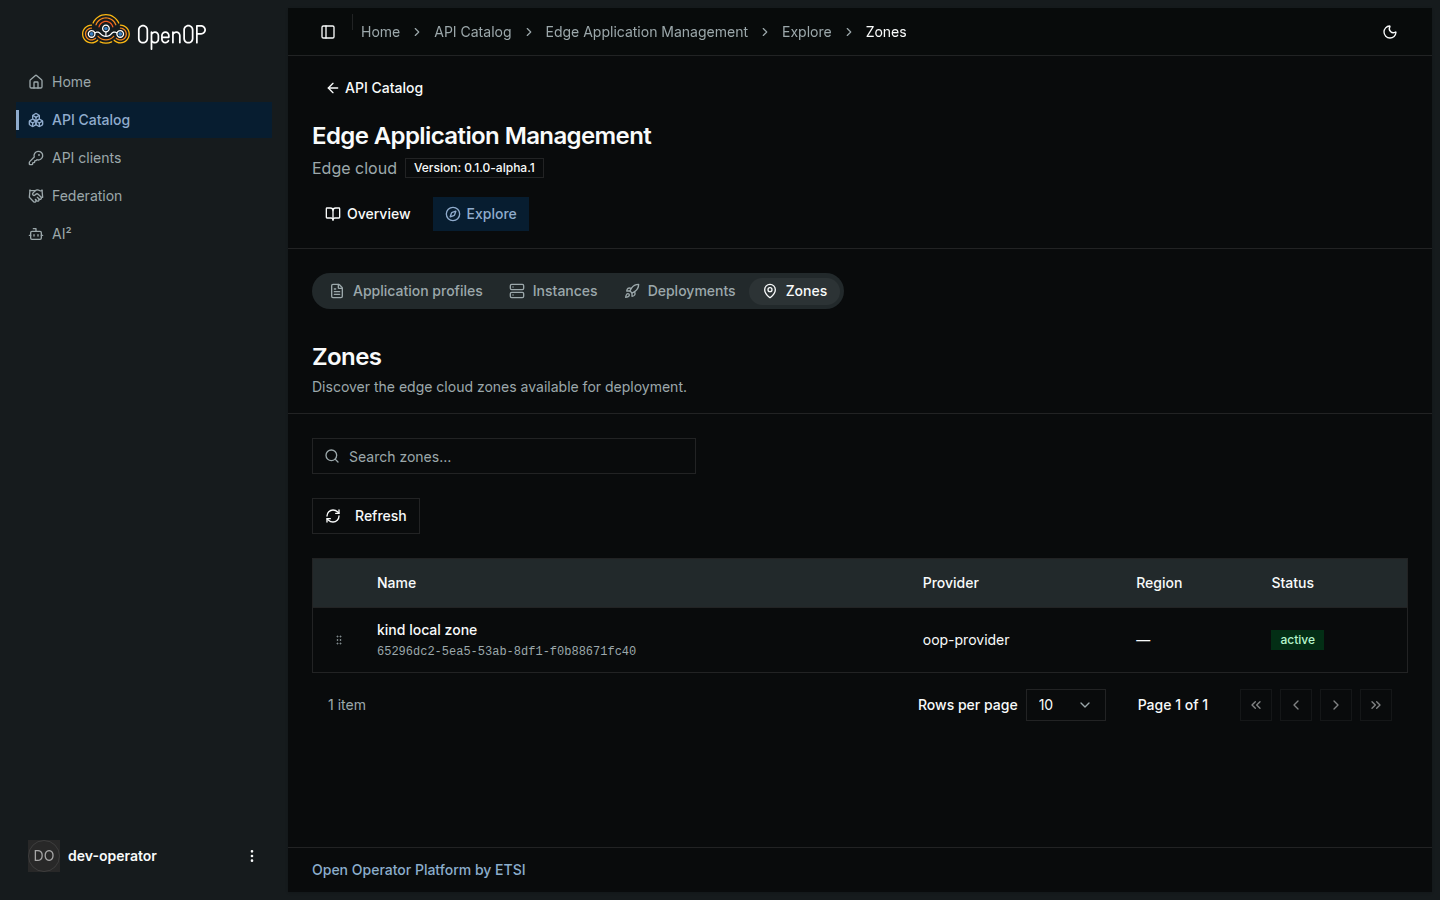
The Zones tab is read-only; no actions are available on this page.
If no zones are listed, the page displays its empty state.
4. Explore API clients
API clients provide credentials for calling the platform's APIs from your own application, independently of your Portal sign-in session.
- Select API clients in the sidebar. The table lists your clients, including their client IDs, status, and API products. It may be empty if you have not created any yet.
- Select Create API client to inspect the form. Each client needs a name and at least one API product. You can select only products already granted to your account. For example, enter
edge-video-analyticsas the name and select Edge Application Management. - Select Cancel to return to the list. You will create a client in the next tutorial, Get API access.
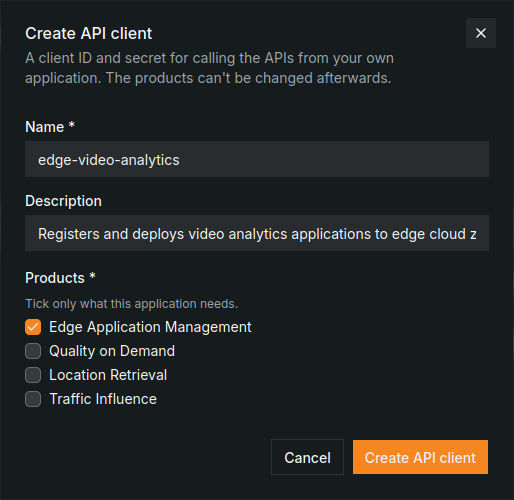
When you create a client, its secret is shown only once. Save it securely before closing the dialog. The selected API products cannot be changed after creation.
5. Explore Federation Management
The Federation page lets operators manage connections with partner operator platforms. Your account must have the operator role to access this page; app-provider alone is not sufficient.
- Select Federation in the sidebar. The table lists registered partners, their registration and federation status, subscribed zones, and federation URL.
- If a partner is listed, select its name to inspect its details, then close the dialog.
- Check the partner's status. A partner entry does not mean that federation has been established: in the example below, registration is
pending, the partner isNot federated, and no subscribed zones are listed.
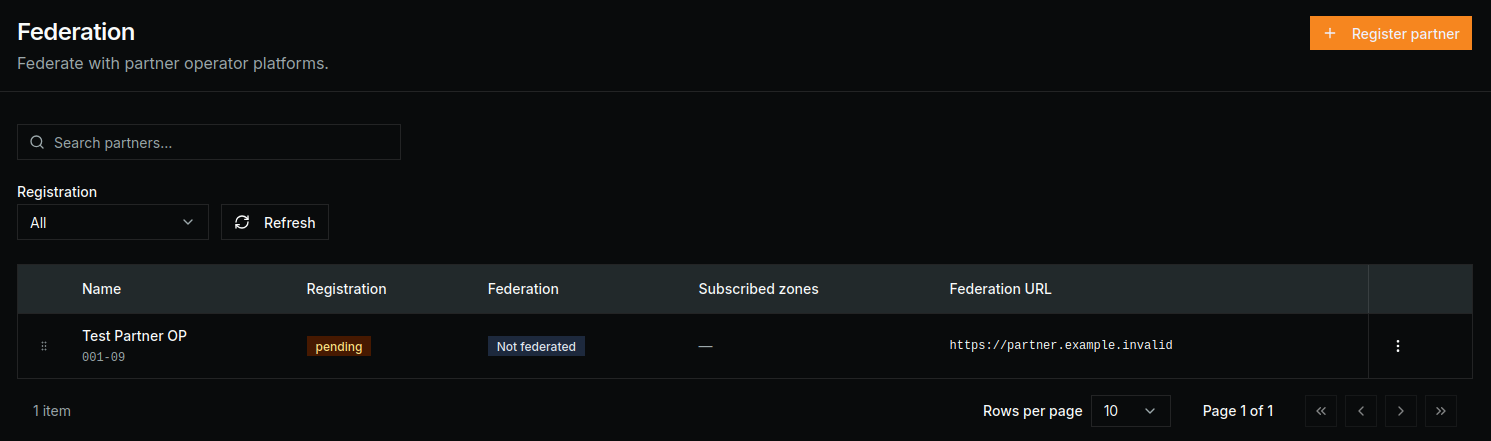
The actions menu of a partner also offers Agreements, Federation and Edit, and, once federated, Zones.
If the page shows No partners yet, there are no registered partners to inspect. You can still open Register partner to view the required information, then select Cancel without creating one.
For the complete setup and federation workflow, see Federate two operators.
6. Explore AI²
This section requires a running AI² agent connected to the Portal. If the chat reports that AI² is not configured or cannot connect, ask your platform administrator to check the integration.
AI² lets you interact with the platform through natural-language requests. Try asking which edge cloud zones are available.
- Select AI² in the sidebar to open the chat.
- Enter
What edge cloud zones are available?in the message box, or select the matching suggested prompt. - Select Send and wait for the response. Review the zones returned for your deployment.
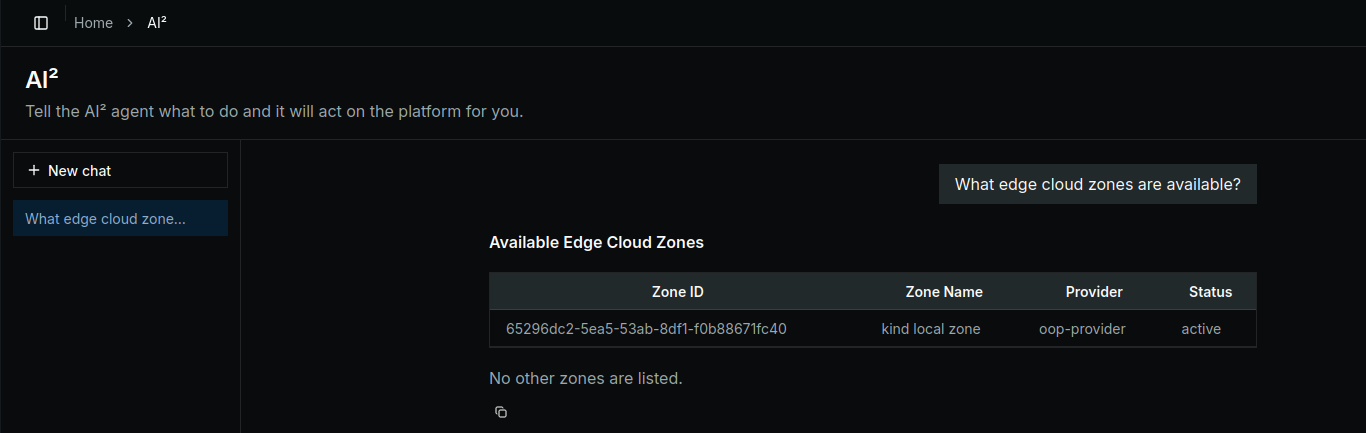
You can also try List registered application definitions. and compare the response with the earlier API request.
For a complete application workflow using natural language, continue with Use AI².
What you learned
You can now navigate the Portal, check your roles and API permissions, and try a request from the API Catalog. You also know where to manage API clients, inspect federation partners with the operator role, and send natural-language requests through AI².
Next steps
Continue with Get API access to create an API client and call the platform from your own application.
Explore the following tutorials for specific workflows:
- Deploy your first application - register an application and deploy it to an edge cloud zone.
- Use AI² - work through an application workflow using natural language.
- Federate two operators - establish federation and deploy an application to a partner's zone.